Activity 1: Upside-down Drawing
How to create an upside-down drawing:
- Select an image that can be printed large. (See if someone is able to select it for you, so you don’t see the image).
- Cover the image with a piece of cardboard that you can’t see through. Ensure that the original image is upside-down when doing so.
- Slowly pull the cardboard down in segments, revealing a little piece of the image at a time. Draw what you see, with all the details of lighter and darker areas.
- Continue revealing the image, as you draw, until the whole image is complete. Turn your drawing the right way up to see what you have drawn.

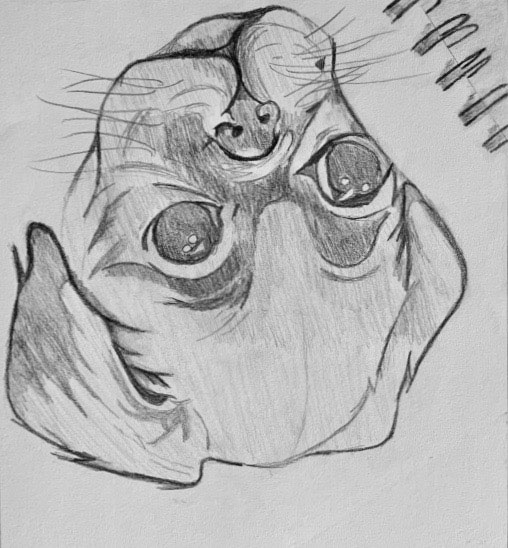
The purpose of this activity is to start drawing what you actually see, rather than what you think you see. For example, if someone asks you to draw a chair or a house, you may use memories to sketch a cartoon like representation of these. This can be contrasted to when you actually observe all the nuances of a chair or house, there will be shading and a sense of depth.
Drawing what is actually there rather than what you think is there is one of the key learnings to improve your drawing ability. This upside-down drawing activity is designed to get you thinking along these lines – you can only see piece by piece at a time, so hopefully you won’t know what you are drawing until its finished. This forces you to only draw what you are seeing.
Activity 2: Experiment with different mediums
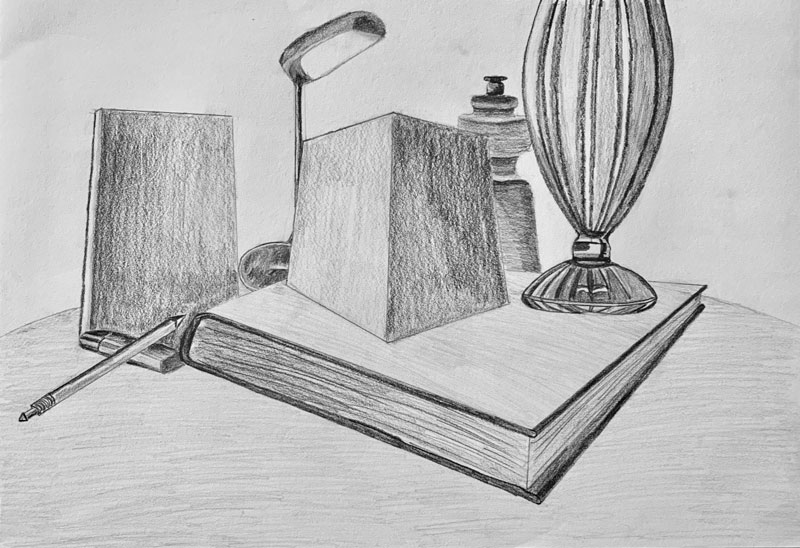
- Set up a still life scene, with items such as books, glasses and fruit. Make it interesting and visually engaging with variety in the items.
- Choose your medium for your first drawing. I used pencil with different weights ranging from H to 6B for one drawing and charcoal for the other.
- Sketch out the shapes, considering the perspective or angle you are viewing from.
- Try to observe which areas are the darkest and which areas are the lightest. Shadows will often be your darkest shade, and highlights or areas where the light directly hits will be the lightest.
- Use your knowledge gained from activity 1 of drawing what is actually there, rather than what you think is there, when adding shading to your work. Trying to add shading based upon your observations will help with this.
- Continue adding depth and detail to your drawing until complete.
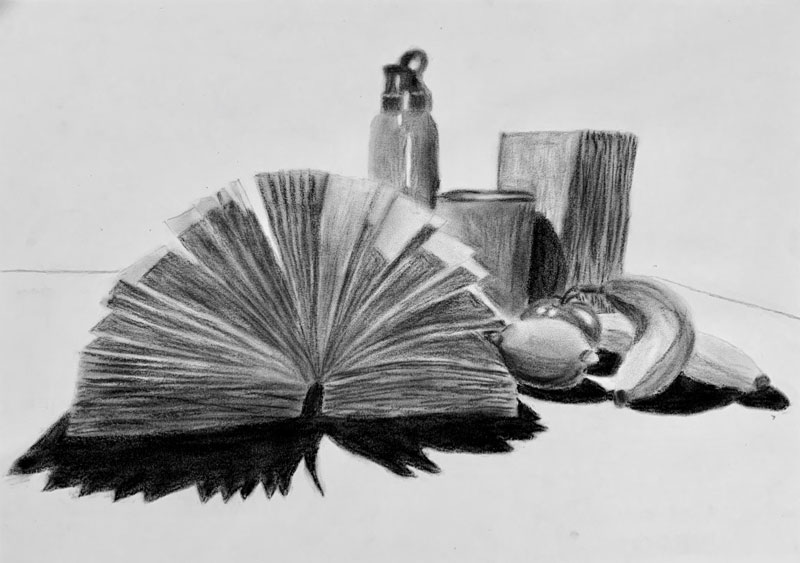
Now select a different medium and set up a new still life scene. Observe the differences in the feel of drawing and the final outcome between the two mediums.
For me, I found that charcoal allowed me to get a really dark shade for the shadows. Also, being able to smudge to charcoal as I worked created a smoother finished look. The pencil, however, was easier to create finer lines and was less likely to smear.

You must be logged in to post a comment.